Think about how airlines assign seats on a plane. Some have extra legroom. Some sit near exits. Some are cheaper, while others cost a premium.
Certain passengers also have strict requirements, like families traveling together or travelers who paid for a specific class.
Now imagine boarding everyone randomly.
A passenger who paid for extra legroom (perhaps for health reasons) ends up squeezed into a middle seat. Families scatter across the cabin. Premium seats sit half empty while the back rows overflow.
That would be an absurdly inefficient use of a $121 million jet and 6,600 gallons of fuel, right?
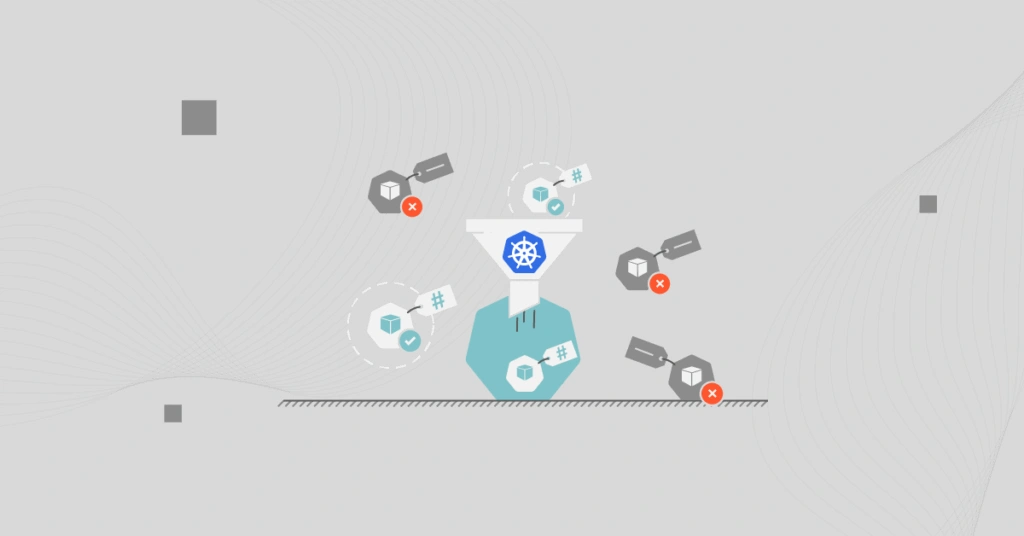
Yet something very similar happens when workloads are placed across a Kubernetes cluster without clear placement rules.
Here, we’ll share why Kubernetes node affinity exists in the first place, and how it compares to the older nodeSelector, especially when you want to balance engineering freedom with cost control at scale.
What Is Kubernetes Affinity?
In Kubernetes (K8s), affinity is how you communicate placement intent to the scheduler — describing where workloads should run, where they must run, and where they should avoid running.
Node affinity is the most commonly used form of affinity. It is a scheduling mechanism that controls which nodes a pod is eligible to run on by matching pod-defined rules against labels applied to nodes.
Node affinity lets you guide where workloads run, based on hardware, performance, reliability, or cost and not just wherever capacity is available.
Related read: Kubernetes Node Vs. Pod Vs. Cluster: What’s The Difference?
At a high level, affinity answers questions such as:
- Which nodes make sense for this workload?
- Which workloads should be kept close together (or far apart)?
- And, what trade-offs are acceptable when the cluster is under pressure?
These rules are evaluated by the Kubernetes scheduler when a pod is created or rescheduled.
From there, the scheduler doesn’t place workloads at random. Instead, it weighs available Kubernetes nodes against the intent you’ve defined and makes a placement decision that best satisfies your conditions.
- For engineers, that means more predictable performance and fewer surprises at runtime.
- For platform teams, it reduces firefighting caused by hot nodes, noisy neighbors, or brittle deployments.
- And for finance and FinOps teams, it directly influences how efficiently your infrastructure is used, like which nodes sit idle, which scale first, and which pricing models (like On-Demand or Spot Instances) the workloads gravitate toward.
And while there are several types of K8s affinity available today, they all fall into two broad categories. One focuses on nodes, and the other focuses on pods themselves.
That distinction matters more than most teams realize, especially when cost and scale enter the picture.

Types Of Kubernetes Affinity And When To Use Each
From a high level, Kubernetes affinity falls into two main categories:
- Node affinity, where a pod can run based on node characteristics, and
- Pod affinity (and anti-affinity), where a pod should run relative to other pods
Let’s break each one down.
1. Node affinity
Node affinity determines which nodes a pod can or should run on by evaluating node labels against explicit scheduling rules defined in the pod spec.
Those rules reference labels applied to nodes, such as:
- Instance type (like CPU vs GPU)
- Pricing model (such as on-demand vs spot)
- Hardware capabilities
- Environment (prod, staging, dev, etc)
- Compliance or isolation requirements
In short, node affinity helps you answer the question, “Which kinds of machines does this workload belong on?”
Use node affinity when you have:
- Hardware-specific workloads (GPUs, high-memory nodes)
- Cost-aware scheduling (spot vs on-demand)
- Separating production and non-production workloads
- Preventing expensive nodes from being used unnecessarily
From a cost perspective (we are a cloud cost optimization platform, after all), node affinity is especially powerful because it directly influences which infrastructure you pay for and how efficiently it’s used. From a FinOps perspective, node affinity acts as a cost-control lever by steering workloads toward the most economically appropriate infrastructure.
2. Required vs Preferred Node Affinity
Node affinity rules come in two flavors: required and preferred. The difference between them has real operational and financial consequences. Required rules define where a pod is allowed to run, while preferred rules influence where it is most economical or desirable to run.
Required Node Affinity
This is defined using:
Nginx
requiredDuringSchedulingIgnoredDuringExecutionThese are hard constraints. Meaning, if no node satisfies the rule, the pod will not be scheduled at all. So, use required rules when your workload truly cannot be run elsewhere and/or when compliance, hardware, or reliability considerations demand it.
But you’ll not want to overuse them, and we’ll share why in the common mistakes to avoid section later on.
Preferred Node Affinity
You define this option using:
Nginx
preferredDuringSchedulingIgnoredDuringExecutionThese are soft preferences, meaning the scheduler will try to honor them, but won’t block scheduling if they can’t be met.
Go with preferred rules when cost efficiency is a big deal, flexibility is acceptable, and you want Kubernetes to make smart trade-offs under pressure.
3. Pod Affinity
Pod affinity controls which pods should run near other pods, like “Which workloads should be placed together?”
Instead of matching against node labels, it matches against labels on existing pods, often within the same zone or node.
Some common use cases for pod affinity include:
- Placing services close to the databases or caches they depend on
- Reducing network latency
- Improving performance for tightly coupled services.
Overall, this type of affinity is more about application behavior than infrastructure economics. But it can still affect your costs by increasing or decreasing network usage and shaping how clusters scale.
4. Pod Anti-Affinity
Pod anti-affinity is the inverse of pod affinity. It ensures that certain pods do not run close to each other, often for availability and fault tolerance reasons.
Some good examples here include:
- Spreading replicas of the same service across nodes
- Avoiding single points of failure
- Increasing resilience during node or zone outages.
While anti-affinity improves reliability, it can also increase your infrastructure requirements by forcing Kubernetes to spread workloads more aggressively. And, if you are in finance, you’ll feel this in the form of a higher baseline capacity.
“Node affinity shapes infrastructure usage. Pod affinity shapes application topology. And Anti-affinity shapes resilience and risk.”
Next, let’s zoom in on Kubernetes node affinity, the most commonly used (and most misunderstood) option, including exactly how it works under the hood.
Kubernetes Node Affinity Explained (How It Actually Works)
Node affinity lets you control which nodes a pod is eligible to run on by matching rules in the pod specification against labels applied to nodes.
Remember that airline analogy we used earlier? Well, this is where you start saying things like:
- This passenger must sit in an exit row.
- This passenger prefers economy seats if available.
- This passenger should never be placed in first class.
Here’s how that logic works inside Kubernetes.
How node affinity actually works under the hood
When a pod is created (or rescheduled), the Kubernetes scheduler evaluates every node in the cluster and “asks”:
- Does this node satisfy all the required placement rules?
- If yes, how well does it satisfy the preferred rules?
- Among all valid nodes, which one scores highest?
The scheduler will only consider the nodes that meet the required criteria.
From there, the scheduler scores the remaining nodes based on preferences and places the pod on the best available match. So, node affinity doesn’t just filter nodes, but also prioritizes them. And that right there (the prioritization) is often where most of the power (and risk) lies.
In practice, this means node affinity both restricts eligibility and shapes optimization outcomes, including utilization, scaling behavior, and cost.
Here’s what we mean.
Node affinity relies entirely on node labels. The labels are simple key-value pairs attached to nodes. See: 12+ Kubernetes Labels Best Practices To Apply ASAP Today
Some common examples of Kubernetes node labels include:
- instance-type=compute-optimized
- accelerator=gpu
- lifecycle=spot
- environment=production, and
- zone=us-east-1a.
These labels describe what a node is, not what it’s currently running.
Node affinity rules then reference those labels to make scheduling decisions.
From a cloud cost governance perspective, it means poorly designed or inconsistent labels lead to unpredictable scheduling and cost behavior.
The cost implications of choosing node affinity rules
When you choose Required Node Affinity (requiredDuringSchedulingIgnoredDuringExecution) rules, the cost implication is that the hard constraints often force clusters to scale for the rule, not the workload. And that can leave expensive nodes underutilized.
If you go the more flexible Preferred Node Affinity (preferredDuringSchedulingIgnoredDuringExecution) way, the cost implication is the tendency to improve utilization and reduce surprise scale-outs, especially in mixed-cost clusters.
Something else, and this is an important detail.
Node affinity is evaluated only when a pod is scheduled, not continuously. If node labels change later, Kubernetes does not automatically evict or move your existing pods.
That behavior is intentional. It prevents cascading disruptions, but it also means your team needs visibility into where pods actually end up versus where they were intended to go.
This gap between where workloads are supposed to go and where they actually land is called scheduling drift, and it’s where many Kubernetes cost problems start.
How Else Node Affinity Impacts Your SaaS Finances
From a finance or FinOps perspective, node affinity influences:
- Which instance types scale first
- How often Spot capacity is successfully used
- How much expensive infrastructure sits idle
- How clusters behave during demand spikes
Two teams can run identical workloads and see dramatically different Kubernetes bills. This is based solely on how their node affinity rules are written. And in the next section, we’ll see how to best use your Kubernetes node affinity with precision.
Kubernetes Node Affinity Best Practices: How To Effectively Use Node Affinity Today
We’ll share examples and YAML snippets. We’ll also share exactly how innovative teams use node affinity in practice, and where they often go wrong, so you can avoid making the same mistakes.
Example 1: Hard node affinity for specialized hardware (GPUs)
Some workloads genuinely cannot run everywhere. Think of machine learning training jobs, video processing pipelines, and certain analytics workloads that require GPU-enabled nodes.
In those cases, a required node affinity rule is appropriate, like this:
yaml
Affinity:
  nodeAffinity:
    requiredDuringSchedulingIgnoredDuringExecution:
      nodeSelectorTerms:
      - matchExpressions:
        - key: accelerator
          operator: In
          Values:
          - nvidia
In this case, the pod will only schedule on nodes labeled accelerator=nvidia. And if no such node exists, the pod stays pending.
The cost trade-off here is that it guarantees correctness, but increases the risk of idle, high-cost nodes if demand fluctuates. It is a classic example of where correctness beats flexibility.
Example 2: Cost-aware scheduling using preferred node affinity
Many workloads can run anywhere. However, many are cheaper when they run on certain nodes, such as Spot instances.
In that case, try Preferred node affinity, like this:
yaml
affinity:
  nodeAffinity:
    preferredDuringSchedulingIgnoredDuringExecution:
    - weight: 80
      preference:
        matchExpressions:
        - key: lifecycle
          operator: In
          values:
          - spot
What’s showing here is how to make Kubernetes strongly prefer spot nodes (cost-effective) and to fall back to On-Demand nodes if Spot capacity isn’t available (to avoid outages and stalled deployments).
This pattern expresses cost intent without making workloads fragile. This is one of the most effective ways to manage Kubernetes costs at scale.
Example 3: Mixing Required and Preferred Rules
In real clusters, you’ll often combine both.
yaml
affinity:
  nodeAffinity:
    requiredDuringSchedulingIgnoredDuringExecution:
      nodeSelectorTerms:
      - matchExpressions:
        - key: environment
          operator: In
          values:
          - production
    preferredDuringSchedulingIgnoredDuringExecution:
    - weight: 60
      preference:
        matchExpressions:
        - key: lifecycle
          operator: In
          values:
          - spot
What this does is enforce production-only nodes. It also prefers cheaper spot capacity within that boundary. So, it’s preserving safety and isolation while optimizing for cost where possible.
Example 4: Avoiding Certain Nodes Entirely
You can also use node affinity to exclude nodes, like this:
yaml
affinity:
  nodeAffinity:
    requiredDuringSchedulingIgnoredDuringExecution:
      nodeSelectorTerms:
      - matchExpressions:
        - key: instance-type
          operator: NotIn
          values:
          - high-memory
Some good use cases for this include preventing small services from landing on expensive nodes and keeping background jobs off latency-sensitive hardware.
It is also one of the simplest ways to prevent accidental misuse of premium infrastructure (a common source of Kubernetes cost creep).
Takeaway: Behind the scenes, Kubernetes filters out nodes that fail required rules, then scores remaining nodes based on preferences, and lastly, places the pod on the highest-scoring option. In short: required rules define what’s allowed, preferred rules guide what’s ideal.
Common Kubernetes Affinity Mistakes (And How To Avoid Them To Reduce K8s Costs)
Here are the most common mistakes we see in production clusters, and why they matter beyond engineering hygiene.
1. Using ‘required’ rules for everything
Use required only when a workload truly cannot run elsewhere. For everything else, lean on preferred rules and let Kubernetes make intelligent trade-offs.
2. Letting node labels sprawl without governance
Affinity depends entirely on node labels. When labels are inconsistent, overloaded, or poorly documented, scheduling behavior becomes unpredictable.
Best practice: Treat node labels like APIs. Standardize them, document them, and change them deliberately.
3. Ignoring how affinity interacts with autoscaling
Overly strict affinity rules can cause autoscalers to add nodes that sit mostly unused. Or worse, they can fail to scale at all because no node group satisfies the constraints.
Better approach: Design affinity rules alongside autoscaling policies, not in isolation.
4. Using pod affinity where node affinity is enough
Pod affinity is often used to steer workloads toward certain nodes when node affinity would be simpler and more flexible.
Better practice: Use pod affinity for application topology. Use node affinity for infrastructure and cost decisions.
5. Assuming intent equals reality
Affinity expresses where workloads should go, not where they actually end up over time. Drift happens because affinity is evaluated only at scheduling time.
Best practice: Keep monitoring and reviewing to improve visibility into your stack.
Other Best Practices for Using Kubernetes Node Affinity at Scale
If you want affinity to support both engineering velocity and financial discipline, you’ll want to apply these principles all the way.
- Prefer flexibility over rigidity: Use soft preferences wherever possible. Flexibility improves utilization and reduces surprise scale-outs.
- Encode the cost intent explicitly: If cheaper nodes exist, say so. If premium infrastructure should be protected, enforce it deliberately.
- Align affinity with ownership: Affinity rules should map cleanly to specific teams, services, environments, product features, etc, not live as undocumented YAML scattered across repos.
- Review affinity during cost spikes: When Kubernetes spend jumps, affinity rules are often part of the story. So, treat them as cost levers, not static config.
- Measure outcomes, not just configuration: Shift the question from “Are affinity rules defined?” to “Are they producing the cost and performance outcomes you expect?”
Yet, there’s just one more best practice you’ll want to apply right away.
See (And Fix) Your Kubernetes Usage and Costs Clearly, In Real-Time, The Smarter Way
CloudZero connects Kubernetes scheduling to real-time cost and business impact, so your affinity rules do more than work; they work profitably.
Without clear visibility into how your Kubernetes components, usage, and costs behave in practice, even well-designed affinity rules create waste.
But with CloudZero, engineering, FinOps, and finance teams close the gap between scheduling intent and financial reality.
Leading teams at Duolingo, Toyota, Remitly, and Grammarly trust CloudZero to help them:
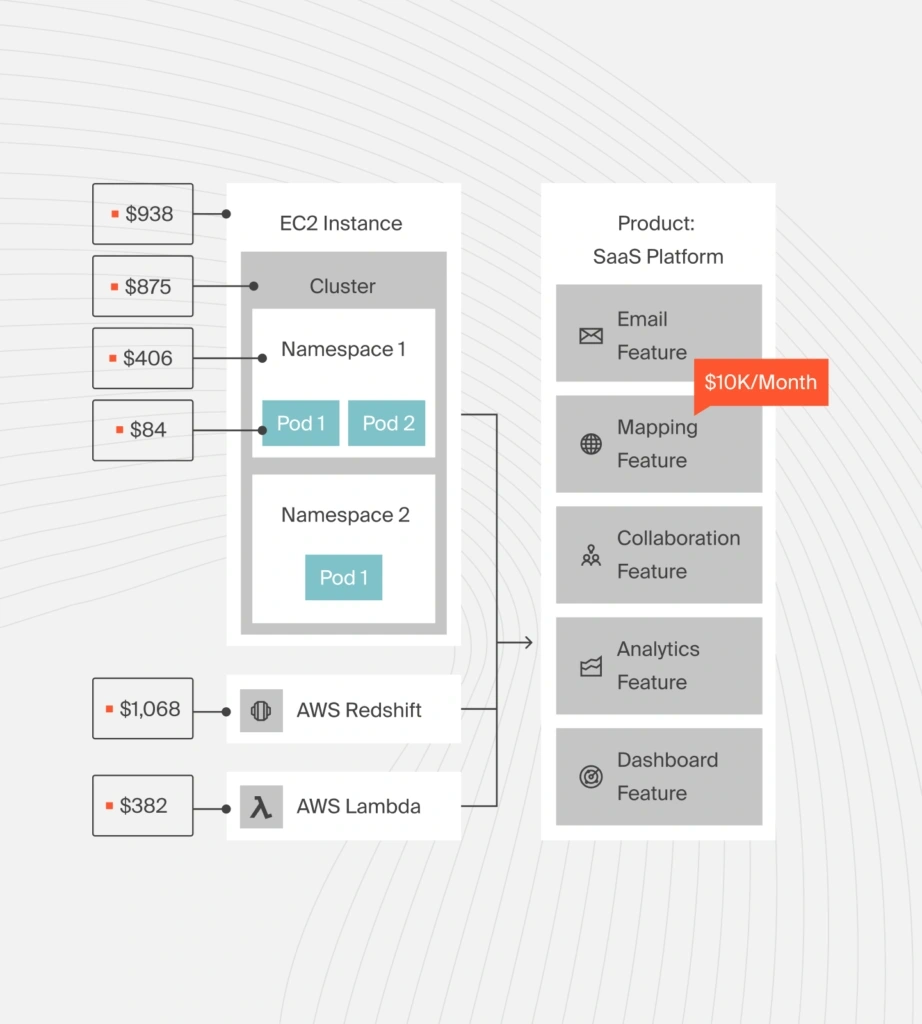
- See Kubernetes costs broken down by service, namespace, environment, and team
- Understand how scheduling decisions affect utilization, scaling behavior, and spend
- Detect anomalies tied to real cluster behavior, not just end-of-month invoices
- Tie infrastructure choices directly to business outcomes and margins
Instead of debating whether affinity rules are “working,” CloudZero helps you see the impact. Clearly. In real time. And in business terms that everyone on your side understands (so they can fix any bleeding).
If your teams are already using Kubernetes node affinity to optimize performance and reliability, CloudZero will help you ensure those same decisions optimize your costs and bottom line, too.
Book your personalized demo here now to start turning your Kubernetes scheduling decisions into clear, profitable insights going forward.


The Cloud Cost Playbook
The step-by-step guide to cost maturity