Kubernetes (K8s) packs a ton of benefits as a container orchestration platform. For instance, K8s is big on automation. This includes automating workload discovery, self-healing, and scaling containerized applications.
Yet, Kubernetes isn’t always production-ready after a few tweaks.
This guide shares crucial Kubernetes best practices you’ll want to start using immediately to improve your K8s security, performance, cost optimization, and container orchestration efficiency. Let’s get to it!
1. Keep Up With The Most Stable (And Latest?)
Here’s the thing. You maybe concerned that the latest version of Kubernetes may have new features you are unfamiliar with, may have limited support, or that it might be incompatible with your existing setup.
The rule of thumb is to update your K8s to the latest stable version. It will likely have all security or performance issues patched already. You’ll likely find more community based or vendor-provided support available as well. Ultimately, the K8s best practice enables you to avoid security, performance, or cost anomalies that could harm your service delivery.
Report
Finance needs to prove AI’s return: CloudZero report
260 senior finance leaders (more than half CFOs) told us why the speed of seeing AI spend, not the size of it, separates who pulls ahead on AI from who gets burned.
2. Versioning Config Files Is Your Friend
Store all config files, such as deployment, services, and ingress ones in a version control system. GitHub is the most popular, open-source, and distributed version control platform for that, but others include GitLab, BitBucket, and SourceForge.
Doing this before pushing your code to a cluster enables you to track source code changes and who made them. Whenever necessary, you can quickly roll back the change, re-create, or restore your cluster to ensure stability and security.
You can also use a rolling update strategy. Rolling updates enable deployment updates, which minimizes application downtime by progressively replacing outdated pod instances with up-to-date ones. Kubernetes documentation explains more about this.
3. Take Advantage Of Declarative YAML Files
Replace using imperative kubectl commands like kubectl run with writing declarative YAML files. You can then add them to your cluster by using the kubectl apply command. A declarative approach lets you specify your desired state, and Kubernetes figures out how to attain it.
YAML files allow you to store and version all your objects along with your code. You can easily roll back deployments if things go wrong — just restore an earlier YAML file and reapply it. In addition, this model ensures your team can see the cluster’s current status and changes made to it over time.
4. Lint Your Manifests
Perhaps you find YAML tricky to work with. Then you can use yamllint, which supports multi-documents within a single file.
Kubernetes-specific linters are also available:
- With kube-score, you can lint your manifests and maintain best practices
- kubeval does lint your manifests, too. But it only checks validity.
In version 1.13 of Kubernetes, the dry-run option on kubectl enables Kubernetes to inspect your manifests but not apply them. This feature lets you verify that your YAML files are valid for K8s.
5. A Git Workflow Is The Way To Go
GitOps, a Git-based workflow, is a top-notch model for automating all tasks, including CI/CD pipelines, using Git as the single source of truth. In addition to improving productivity, adopting a GitOps framework can help you:
- Speed up deployments
- Improve error tracking
- Automate your CI/CD processes
Ultimately, using the GitOps approach helps consolidate cluster management and speed up app development.
6. Couple Pods To Deployments, ReplicaSets, And Jobs
Avoid using naked pods as much as possible. In the event of a node failure, naked pods can’t be rescheduled because they’re not bound to a Deployment or ReplicaSet.
A Deployment accomplishes two things:
- Maintains a desired number of pods by creating a ReplicaSet
- Defines a strategy for replacing pods, such as a RollingUpdate
Deploying is almost always more efficient than creating pods directly — well, unless you have strict restartPolicy: Never use cases. You can also use a Job.
7. Say What You Want With Resource Requests And Caps
Resource requests define the least amount of resources that a container can consume while resource limits specify its maximum consumption.
When defining CPU and memory limits for either requests or limits, millicores are typically used for CPUs and mebibytes or megabytes for memory. Containers won’t run in a pod where the a resource request exceeds the limit you’ve set.
Without resource limits and requests, production clusters may fail when resources are insufficient. Pods in a cluster can also consume excess resources, increasing your Kubernetes costs. Moreover, nodes can crash if pods consume too much CPU or memory, and the scheduler is unable to add new pods.
8. Clearly Label Your K8s Resources
Each K8s cluster comprises different components, such as containers, services, pods, and networks. As a cluster grows, it becomes increasingly difficult to manage all of these resources and keep track of their interactions.
Labels are key/value pairs that help you recognize the attributes of a particular resource in Kubernetes clusters. Labels also let you filter and select objects with kubectl, empowering you to identify objects quickly based on a particular characteristic.
It’s a good idea to label your objects even if you do not think you’ll use them right away. Also, use as many descriptive labels as you can to distinguish between the resources your team needs to work on. You can label your objects by owner, version, instance, component, managed by, project, team, confidentiality level, compliance aspects, and more.
9. Namespaces Simplify Resource Management
Namespaces help your team partition a cluster logically into sub-clusters. This is particularly useful when you want to share a Kubernetes cluster among different projects or teams concurrently. With namespaces, you can enable, say, dev, testing, and production teams to work within the same cluster simultaneously without overwriting or interfering with each other’s projects.
Kubernetes provides three namespaces right off the bat: default, kube-system, and kube-public. A cluster can support multiple namespaces, logically separate from each other but able to communicate.
10. Run Liveness Probes (After This Other Probe)
Liveness probes perform regular health checks on long-lived pods, preventing Kubernetes from directing traffic to unhealthy ones. Kubernetes (kubelet default policy) automatically restarts pods that fail a health check, ensuring the availability of your app.
The probe pings the pod for a response. No response means your app is not running on that particular pod, triggering the probe to launch a new pod and run the application there.
Another thing. You must first run a startup probe, a third type of probe that signals to K8s when a pod has completed its startup sequence. The liveness and readiness probes do not target pods if their startup probe is incomplete.
11. Use Custom Readiness Probes
Speaking of a readiness probe, it helps detect, interpret, and track the health of your Kubernetes applications. Readiness probes assess a pod’s capability to accept traffic.
The readiness probe triggers a pod restart when it detects an unresponsive pod. Configure a time delay to give large config files some time to load. Otherwise, the probe could terminate the pod before it loads fully, causing a restart loop.
Kubernetes’ documentation shows you how to conduct a readiness probe. Or, you can follow Google’s way here.
12. Detect And Respond To SIGTERM
Kubernetes will send the “SIGTERM” signal when it is attempting to safely stop a container. You’ll want to look out for it and respond as necessary in your app, such as by closing connections and saving a state.
Be sure to configure terminationGracePeriodSeconds on your pods to terminate containers with a grace period. It is set to 30 seconds by default. Then again, your application may require longer (or less) time to terminate properly, so set it up as you need.
You’ll also want to follow the recommendations the twelve-factor app provides for your application.
13. Keep It Stateless
In general, stateless apps are easier to manage than stateful apps, although this is changing as Kubernetes Operators become more popular.
A stateless backend ensures teams new to Kubernetes won’t have long-running connections that limit scalability.
Stateless apps also ease migrations and scaling on demand.
One more thing. Keeping workloads stateless enables you to take advantage of spot instances.
Here’s the thing. A downside of using Spots Instances is that providers like AWS and Azure often require the cheap compute resources back on short notice, which can disrupt your workload. You can solve this problem by making your application stateless.
Ensure a smooth user experience by preserving the cluster for differentiated services and storing data separately.
14. Set Up Kubernetes Role Based Access Controls (RBAC)
Picture this:
In a survey of over 300 DevOps professionals in 2022, RedHat found that:
- Security issues delayed application releases for 55% of respondents
- As for continuing to use Kubernetes and containers, 59% cited security as a major stumbling block
- 31% said a security issue led to revenue or customer loss
- Almost all of them (94%) experienced at least one Kubernetes security incident within the previous 12 months
Credit: 2022 Red Hat Kubernetes Adoption, Security, and Market Trends Report
Using RBAC, you can define which users can access which Kubernetes resources, including which clusters they can access, who can make changes, and to which extent they can make the changes.
You can set RBAC permissions in two ways:
- ClusterRole if you want to set permissions for a non-namespaces resource
- By Role for namespaced Kubernetes resource
The following example shows how to use ClusterRole to grant read access to services across all namespaces:
apiVersion: rbac.authorization.k8s.io/v1
kind: ClusterRole
metadata:
name: reader
rules:
- apiGroups: [""]
resources: ["services"]
verbs: ["get","watch","list"]
You can use ClusterRoleBinding and RoleBinding if you want to reference roles already administered on a group, service, or user account.
15. Establish Your Network Policies
In Kubernetes, a network policy specifies which traffic you will allow and which you won’t. It is like installing firewalls between pods within a Kubernetes cluster. Regardless of how traffic moves between pods within your environment, it will only be allowed through if your network policies approve it.
To create a network policy, you must define authorized connections and specify which pods the policy should apply to. This blocks any traffic that does not meet your requirements.
In this repository, you will find various examples of Kubernetes Network Policies and sample YAML files you can use.
16. Firewall Your Kubernetes Environment
Another of the most important Kubernetes security best practices.
Along with network policies to control internal traffic within your cluster, set up a firewall in front of the cluster to limit external requests from reaching the API server. You can do this using regular or port firewall rules.
Also ensure that IP addresses are whitelisted and that open ports are restricted.
Here are some more Kubernetes security best practices:
- Be wary of random base images.
- Use a non-root user within the container whenever possible.
- Ensure that the file system is read-only (readOnly FileSystem: true).
- Use Helm Charts to define, configure, and upgrade K8s apps of any complexity.
- Isolate your Kubernetes control plane and data from direct exposure to public and even the general corporate network.
- Ideally, configure each node with an ingress controller, setting it to only accept connections from the master node on a specified port via the access control list (ACL).
- Rather than keep secrets in an environment variable, use them as files. Alternatively, leverage a secretKeyRef to minimize the risk of an attack.
- Disable NET_ RAW capabilities in a pod’s securityContext definition to restrict networking risks within the cluster.
- Avoid sharing the host’s IPC or network namespace to prevent opening access to shared information and breaking network isolation.
- To prevent containers from performing operations that call for root privileges on the host, ensure that containers do not run in privileged mode.
Oh, one more thing. Using a deployment with unsafe/proc mount (procMount=Unmasked) allows bypassing the container runtime’s default masking behavior, so be sure to check for it.
17. Pick And Activate The Right Kubernetes Auto-Scaler
Kubernetes makes it easy to quickly scale resources up or down dynamically as your requirements change. Choosing and enabling the right auto-scaler is crucial to realizing this advantage.
K8s offers three options:
- Horizontal Pod Auto-scaler scales your system to match perceived CPU usage
- Vertical Pod Auto-scaler gives recommended values for CPU and memory limits, and can automatically update them
- Cluster Auto-scaler adjusts your r worker nodes’ pool size depending on utilization.
Each approach has its pros and cons, so be sure to explore them if you’re unsure which one is right for you.
18. Prefer Alpine Images Over Base Images
Base container images often come with a lot of baggage. Experienced engineers know they can work without the default libraries and packages included in base images. Alpine images can be 10X smaller than base images, speeding up builds, taking up less space, and pull images faster.
Something else. The smaller the container image, the fewer things there are to worry about. As your application grows, you can always add specific packages and libraries.
There’s more.
19. Smaller Images Are More Ideal
Ensure your images are small and layered. The smaller the image, the faster the build will be and the less storage you will need. Layering an image efficiently can significantly reduce its size. You can optimize your images by building them from scratch.
How?
When you need many different components, use multiple FROM statements in a single Dockerfile. The setup will pull each layer based on the FROM command within the deployed container.
The feature generates sections, each of which refers to a distinct base image. The resulting Docker container is slimmer because it no longer contains previous layers, just the components you need.
20. About Stderr And Stdout Logs
The standard output stream (stdout) is where you send application logs, and the standard error stream (stderr) is where you send error logs. Whenever an app writes to stdout or stderr, a container engine, like Docker, records, redirects, and stores the file in JSON format.
Yet containers, pods, and nodes in Kubernetes are highly dynamic entities. These require consistent and persistent logs. So, it’s best to keep cluster-wide logs on different backend storage such as the ELK Stack.
21. Set Pod Disruption Budgets
Here’s the deal. Draining a node deletes and reschedules all pods on it. But suppose you have a heavy load and you can’t afford to lose over 50% of your pods. In that case, you’ll want to define a Pod Disruption Budget to protect the Deployments from unexpected events that could cause unavailability.
Doing this instructs Kubernetes to always prevent the drain event from deteriorating availability further when the final state results in less than the number of Pods you’ve specified for that Deployment. Learn more about Pod Disruption Budgets here.
22. Kubernetes Storage Best Practices
When creating a life cycle for Persistent Volume (PV) as part of your Kubernetes storage best practices:
- Always configure Persistent Volume Claims (PVCs) as part of the container configuration.
- Avoid including PVs in container configuration as this strongly pairs a container to a particular volume.
- Always specify a default StorageClass, or else PVCs without a specific class will fail.
- Name StorageClasses meaningfully.
Limiting storage resource consumption is another K8s storage best practice to implement immediately. Do this using:
- Resource Quotas: This method limits how much storage, CPU, and memory all containers within a Kubernetes namespace can use.
- StorageClasses: Limits how much storage is allocated to containers in response to a Persistent Volume Claim.
23. Track Your K8s Control Plane
The control plane is the Kubernetes cluster’s brain. It includes:
- Kubernetes API Service
- kubelet
- controller-manager
- etcd
- kube-dns
- kube-proxy
Monitoring the control plane helps identify vulnerabilities within the cluster. We recommend you use a robust, continuous, and automated K8s monitoring tools rather than managing this manually. You’ll also be able to monitor resource usage so you can optimize performance and costs.
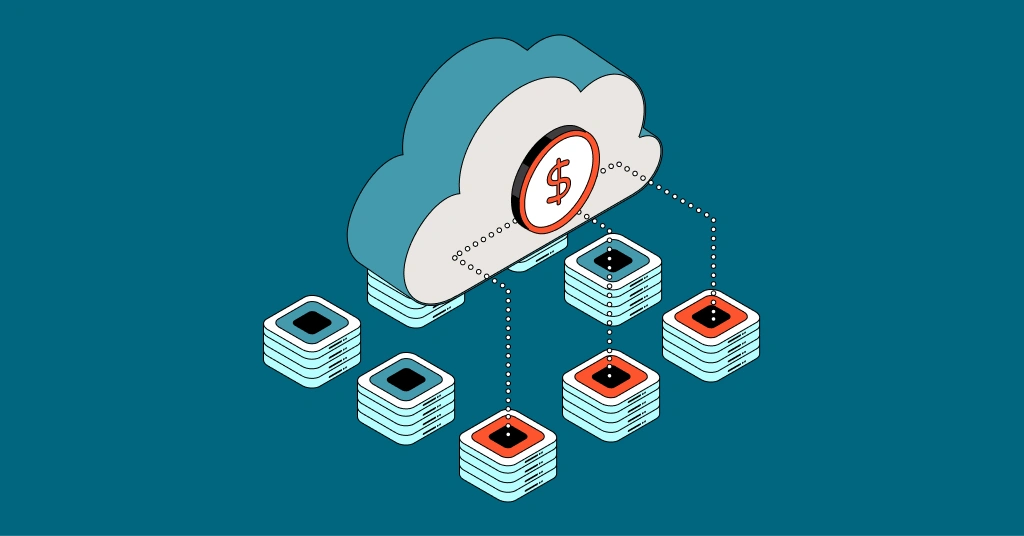
What Next: Collect, View, and Optimize Kubernetes Costs the Easy Way
Kubernetes costs can be notoriously difficult to view across your entire environment, whether you’ve been working with the technology since its Borg days or are just starting to explore containerized infrastructure.
Without a proper Kubernetes cost analysis, you could easily overspend, shrinking your margins. You may have to pass on these costs to your customers, making your Kubernetes-based services more expensive compared to competitors (who are waiting eagerly to take your customers).
Yet most Kubernetes cost monitoring tools barely provide you with the data you need to understand who, why, and what is driving your K8s costs. Not CloudZero.
With CloudZero’s Kubernetes cost analysis, you can view, interact, and share your K8s cost insights down to the hour, pod, namespace, and cluster. Not tags necessary. Like this:

If you want a complete picture, you can merge containerized and non-containerized costs together, filtering cost per item as you need, like this:

With CloudZero, you get cost intelligence from AWS, Azure, GCP, Snowflake, New Relic, and more. Then you can see your costs per customer, project, team, feature, product, environment, deployment, etc – like this:

You’ll be able to:
- See exactly where your Kubernetes budget is going
- Pinpoint where you can cut costs
- Receive intelligent alerts when you are about to exceed your K8s budget to prevent overspending
- Tell how much you spend to support each customer, feature, etc, so you can price your services profitably
- Track both your internal and customers’ resource utilization patterns, so you can plan accordingly to meet service-level agreements (SLAs). There’s more
But don’t just take our word for it.  to see CloudZero in action.